 Narrowsburg
Light Rain Fog/Mist, 43°
Wind: 8.1 mph
 Narrowsburg
When I was a child, the wall in the upstairs hall had a mysterious bulge.
It was maybe five feet up, way over my head, and was the most tempting thing ever. What was in there?
“Don’t poke it,” Dad said when he caught me on the stepstool, ice pick in hand. “There’s a body in there and you’ll upset it. Leave it alone.”
I followed orders. Over the years, the bulge got bigger and bigger, as if the wall were pregnant and eventually would give birth to—another wall?
Eventually, my husband, daughter and I took over the house and its boatload of problems—including the bulge, which had only gotten bigger. We continued to follow orders and let it be.
About five years ago, part of the bulge fell off in the middle of the night. There was no body (Dad! You lied!), just some strips of wood, some plaster dust and a deep, dark crevice that went to places unknown.
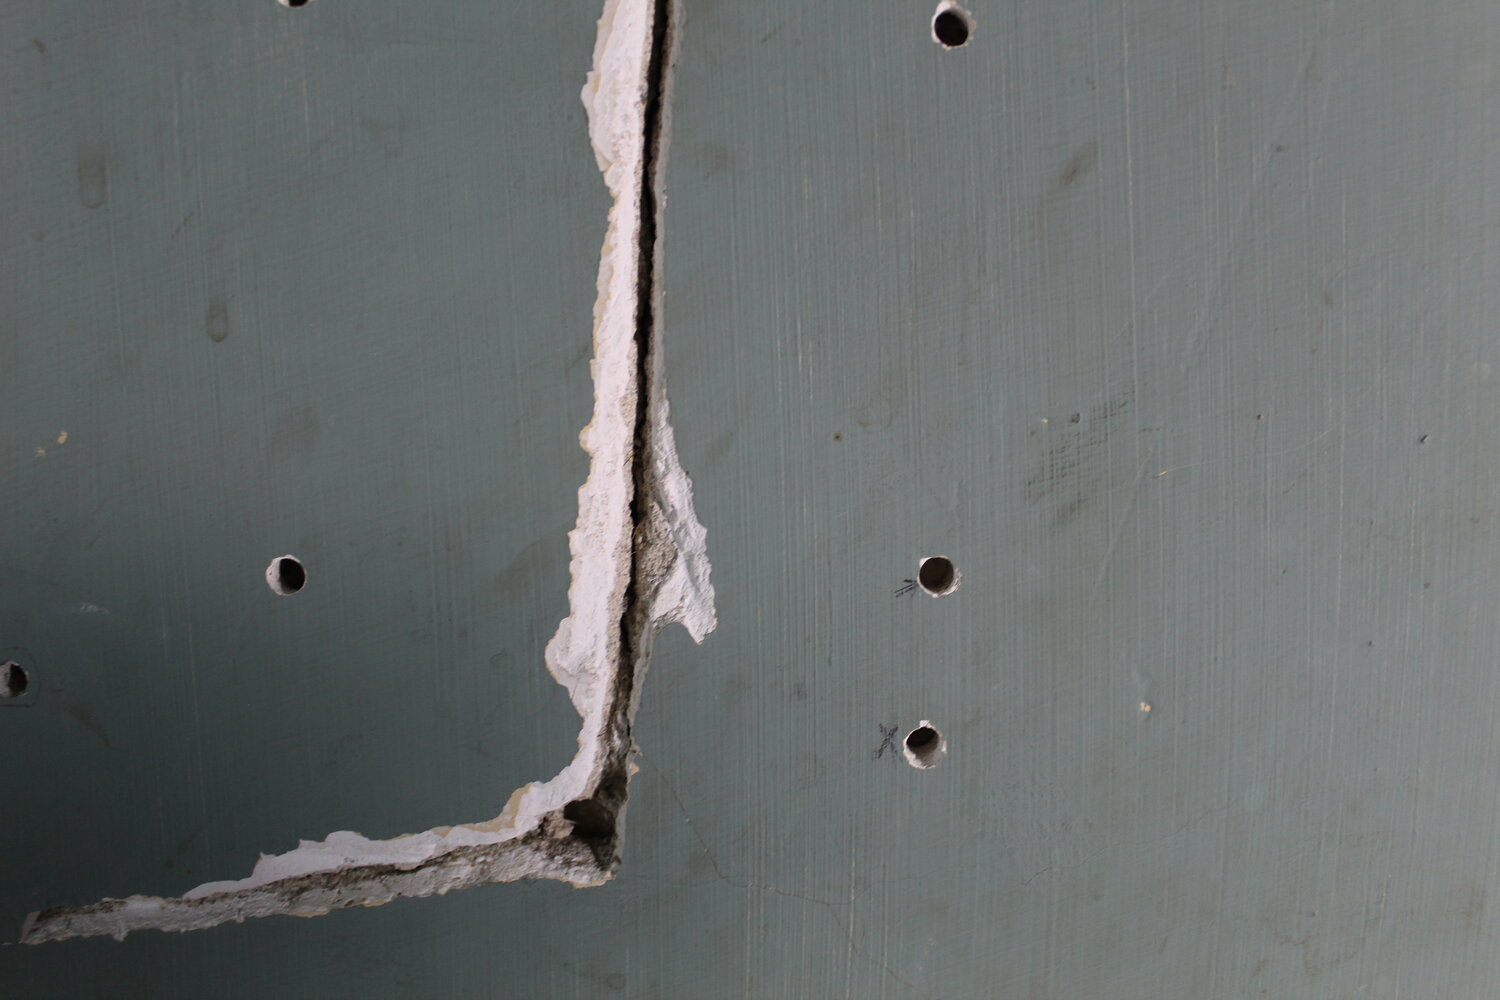
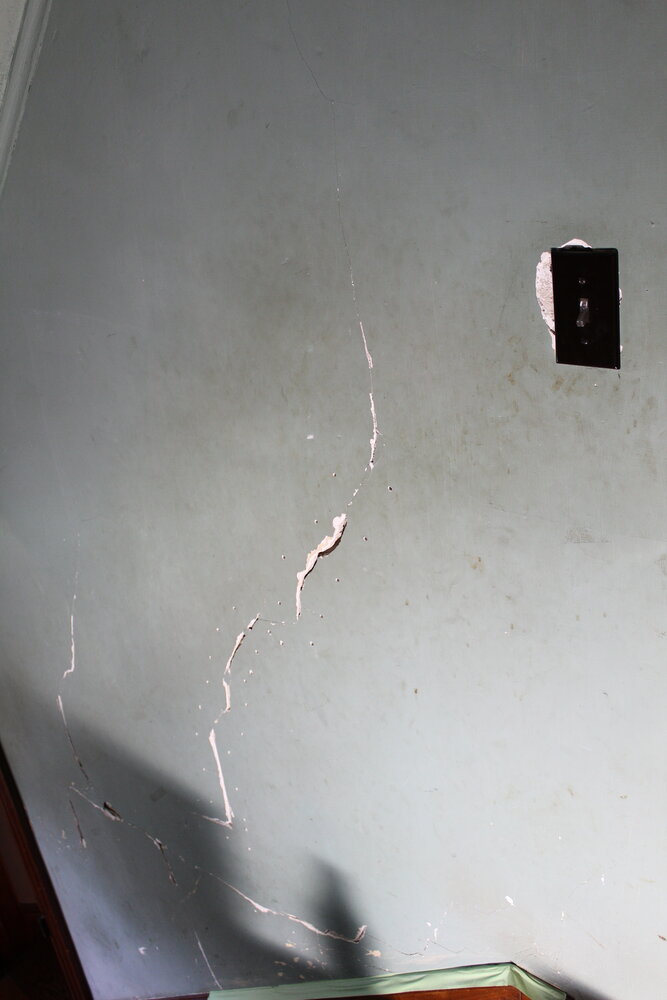
The wall is a mess. All the walls are a mess: They are plastered, they are cracking, they have holes. It’s embarrassing.
So it’s time to stop procrastinating and deal with the problem.
Not the remains of the bulge—that’s overwhelming—but smaller cracks along the stairwell, cracks I have loathed for decades now.
Surely we can fix them.
Surely.
An old plastered wall is made of studs crisscrossed with lath. The lath, which could be made of wood, gypsum, or metal, is coated with a base layer of plaster, then more layers and finally a finishing coat of white plaster.
Then it’s topped with paint or paneling or old, peeling Victorian wallpaper that might be poisonous. (Our walls also include small live mammals, but your mileage may vary.)
Ours suffers from age, humidity and that time the house was jacked up. Humidity creates moisture which gets into the cracks, which expand and contract and expand again.
Repairing plaster is not as simple as just mixing more up and slapping it on.
Over time, the plaster can become loose, disinterred from the lath. It develops structural cracks. It can bulge. Sometimes the lath breaks. (We’re assuming here that your lath is intact, otherwise you’ll have to fix that first and handyman types will mutter, “Why not just put up drywall?” Hush, handyman types.)
See if the plaster is loose. In our house, the answer is invariably “Yes.” You might feel it move when you push on it—it is wibbly. (Of course that’s a word. Do you doubt me?)
Test an uncracked area to know what it should feel like: solid, stable, not wibbly at all.
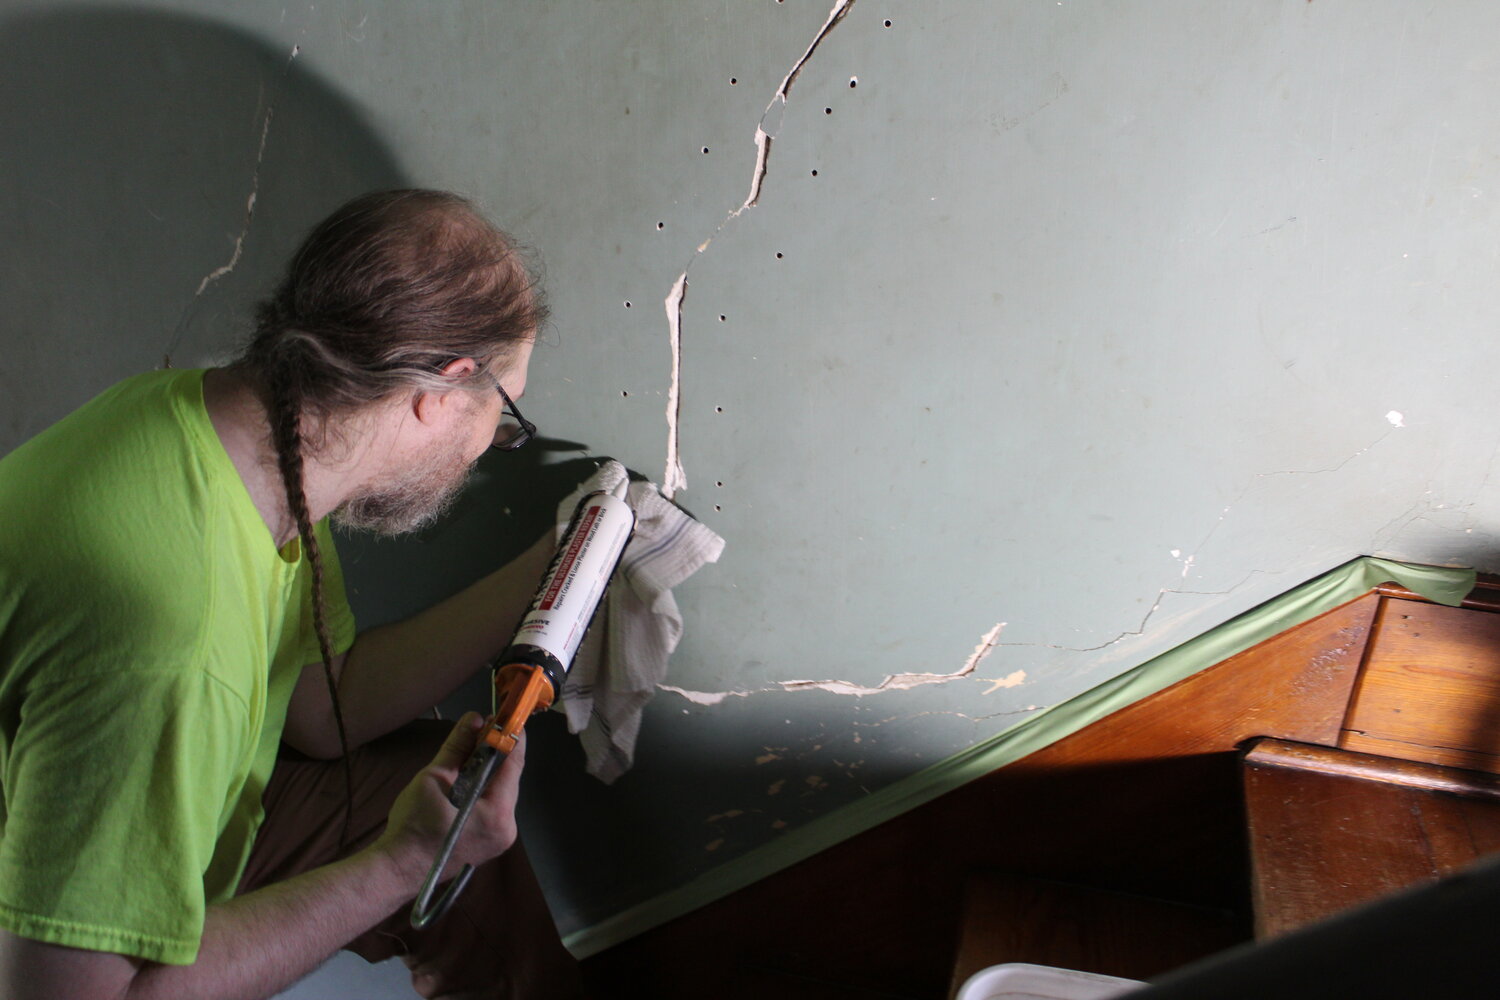
If you have loose plaster, you’ll first need to bind it back to the lath. We used a product that was recommended on This Old House’s website and Bob Vila’s website and about 1,000 other places.
First, cover any sensitive bits of house near and especially under the crack with green painter’s tape for protection.
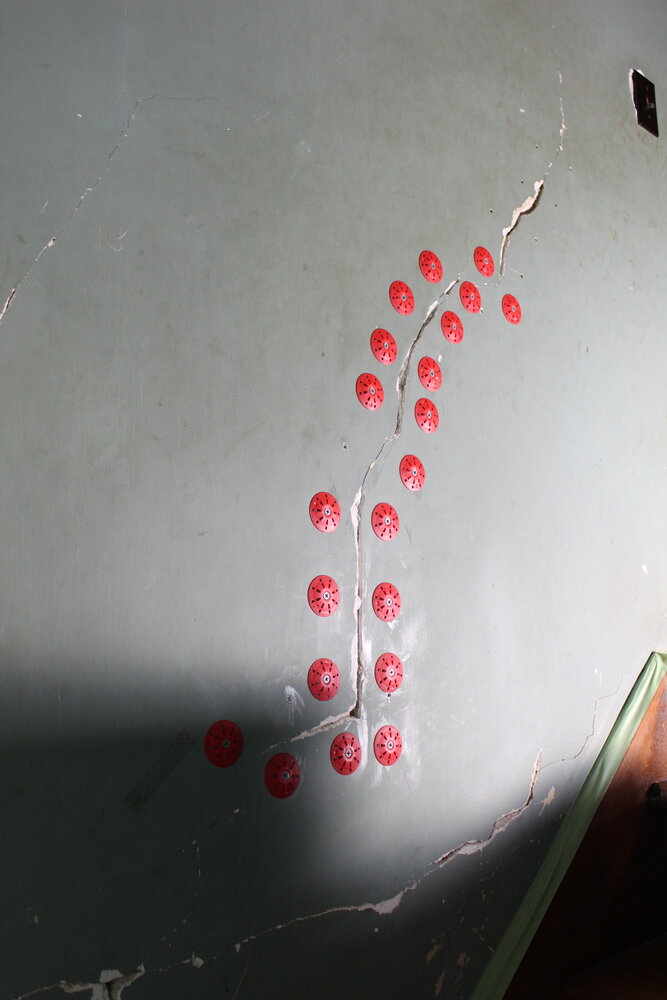
Then if you’re using a similar product, drill spaced holes through the wibbly plaster into the lath. Add conditioner, add adhesive, and stabilize it all with plastic washers and drywall screws in those now-goopy holes. Wipe up the goop as it squirts out of other holes.
Let it sit for 24 hours, or five 10 enough days to dry in the horrible humidity.
Then remove the washers and screws and behold your attached wall.

This was, for me, uncharted territory; but my husband—a handyman—knew just what to do: cut under the wall surface in each crack, making it wider on the inside than on the outside, if that makes sense. He used a sacrificial screwdriver.
Then insert some prepared plaster, building up layers, letting each dry before applying more.
I of course consulted books to see what people did back when plastered walls were common.
The first book of choice was “Every Man His Own Mechanic,” published in 1896, almost 1,000 pages long and with lots of detail. There are pictures of tools, lath and scored plaster.
The second was “The New York Times Complete Manual of Home Repair,” aged 57, by Bernard Gladstone. This was great for actual plastering instructions.
First, vacuum those cracks, getting all the plaster dust out.
You’ll need dry plaster, which comes in buckets. Mix up some plaster with water in another container per the instructions on the bucket. The books call for a “thick, buttery consistency.”
Tip: Don’t use a container you want to keep.
If the crack is deep and you can see the lath, you’ll need to make a brown coat. Once those coats included horsehair, but now we just put down a layer of plaster.
Cut away some of the plaster under the top layer, per my husband above.
Then wet down the area to be patched. Use a putty knife to apply some plaster—this is just a first coat, so don’t fill the whole thing.
Let it dry. When it is partly dry, take your putty knife and score a bunch of lines to roughen it up so the next layer has something to adhere to.
When it’s dried completely, wet down the plaster in the crack (I know, I know) and add the second layer. This could be the top layer if the crack isn’t very deep. If you need more layers, repeat.
For the final coat, collect some plaster with the knife, put it on a trowel, and apply. “Use enough pressure to pack it tightly and make the finish as smooth as possible,” said Gladstone.
“Every Man” cautions that “great care must be taken… in the finishing coat… to a surface smooth and level in every part, as there are few things more unsatisfactory to the eye than an uneven wall.”
Good to know. But I can think of one thing even more unsatisfactory: we are still waiting for a layer of plaster to dry. The first layer.
You think waiting on paint is bad?


Comments
No comments on this item Please log in to comment by clicking here